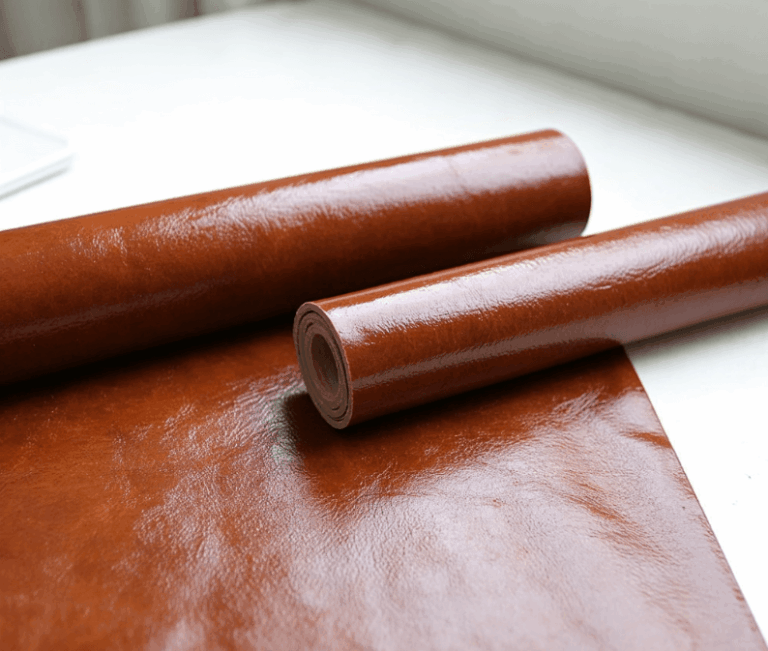
Bag Hardware refers to all the metal accessories found on handbags. It combines functionality and decoration, and is a crucial detail that determines the texture, durability, and brand value of the bag.
High-quality hardware is not only an extension of the brand’s aesthetics, but also an important detail for identifying authenticity and demonstrating craftsmanship value.
During daily use, the hardware of the bag may become dull, dirty, or even rusted. So, how should we restore the luster of the bag’s hardware?
This article explores how to clean and repair the bag hardware and how to remove rust.
What Is Bag Hardware?
The hardware components of a bag refer to the collective term for the metal parts used for connection, fixation, and decoration in the manufacturing of handbags or accessories. They can be regarded as the “framework” and “jewelry” of the handbag. These components have both practical and decorative functions and play a crucial role in the durability, usability, and overall appearance of the bag.
The hardware of a bag includes components such as zipper pulls, clasps, hooks, D-rings, foot nails, chains, and various rivets. These components not only perform key functions such as opening and closing, bearing weight, and adjusting the shoulder strap, but also directly determine the overall texture and durability of the product.
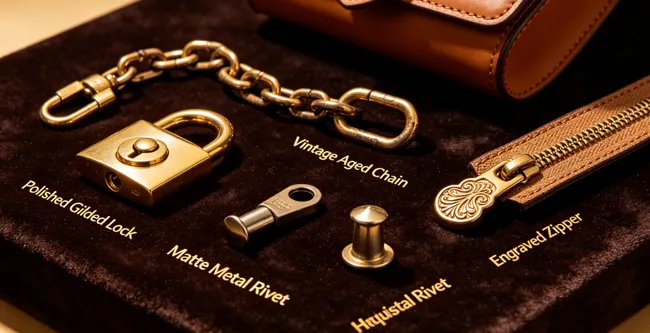
Common Types of Bag Hardware by Function
| Category | Examples | Purpose |
| Closures | Lock, twist lock, magnetic snap, zipper, buckle, turn lock | Secures the bag opening |
| Connectors | Lobster clasp, D ring, O ring, swivel hook, slide buckle | Attaches straps to the bag body; adjusts strap length |
| Handles & attachments | Handle base, metal top handle, handle bracket | Connects handles to the bag; distributes weight |
| Protectors | Feet (bottom studs), corner guards, edge protectors | Prevents wear on the bottom and corners |
| Decorative | Logo plate, padlock, charm, rivets, chain, studs | Enhances brand identity and visual appeal |
| Internal hardware | Zipper pull, interior pocket zipper, key ring clip, internal D ring | Improves organisation and |
How Does Hardware Affect a Bag?
- Durability: High-quality hardware ensures that the handbag can open and close reliably, carry weight, and withstand years of use. Cheap hardware is prone to damage (zippers getting stuck, clasps loosening, rings bending).
- Weight: Heavy, sturdy brass materials with thick and flawless surface coatings increase the bag’s weight, indicating superior quality. While lightweight, thin, or easily fading hardware suggest a lower-end product, giving the impression of being less substantial.
- Appearance: The surface treatment of the hardware determines the style of the bag (matte black, shiny gold, retro copper). The surface treatment of the hardware (gold, silver, copper, matte, glossy) must match the color and texture of the bag’s material.
- Brand recognition: Fashion accessories are closely linked to the brand and can be recognized at a glance. Signature hardware (such as Chanel’s chain leather weaving, Hermès’ clasp closure system) becomes a classic.
- Value: High-end bags use investment-cast, hand-polished, or engraved hardware.
Why Are Bag Hardwares Important?
High-quality accessories give the impression of being sturdy, smooth-running, not fading easily, and complementing the appearance of the bag well. They are even regarded as the “soul” of the handbag. For high-end bags, the accessories alone can account for 15% to 25% of the total production cost, and they are usually specially customized by professional suppliers.
High-end brands use materials such as solid copper or stainless steel that have undergone vacuum coating treatment to ensure that the hardware feels heavy, sturdy, and not prone to fading. In contrast, cheap hardware may feel lightweight and hollow, and may peel off or rust over time, thus damaging the original beautiful appearance of the handbag.
Why bag hardware Matters So Much
| Reason | Explanation |
| First impression of quality | You feel and hear hardware before you even look at the leather |
| Durability indicator | Cheap hardware = peeling, rusting, breaking → the bag feels “cheap” fast |
| Brand identity | Gold = classic luxury (Hermès). Gunmetal = edgy (Balenciaga). Minimal = modern (The Row) |
| Resale value | Buyers check hardware condition first — scratches or tarnish = instant value drop |
| Cost | Hardware can be 8–15% of total bag cost at luxury level |
How to Clean Bag Hardware?
When the hardware of a bag gets dirty, how should it be cleaned? Cleaning and maintaining the hardware of a bag is actually not complicated. By grasping the core principles and applying methods specific to different materials, you can keep the hardware of your beloved bag looking brand new for a long time.
From another perspective, cleaning the metal parts of a bag is a meticulous task because “metal parts” are not a single material – they are usually made of a basic metal (such as brass or zinc alloy) and have a thin coating (such as gold, silver, palladium, etc.) on the surface.
Steps for Cleaning and Caring
- Prepare basic tools: Soft microfiber cloth, cotton swabs, soft dry brush, and mild neutral soap. Avoid using irritating chemicals, alcohol, bleach or rough brushes – they will fade and scratch the metal coating.
- Dry cleaning first: First, gently wipe the handbag accessories with a dry microfiber cloth to remove dust, dirt and minor fingerprints. Use cotton swabs to clean the small gaps on the locks, chains and clasps.
- Light wet cleaning: Soak a damp cloth in a small amount of warm water and mild soap, wring it out thoroughly, and then slowly wipe the handbag accessories. Do not let water penetrate the leather or stay on the metal for a long time.
- Gently remove rust: For minor oxidation and dullness, continue to use a clean dry cloth to gently wipe. Do not use metal polish on high-end handbags with metal plating, as this will wear off the gold or silver coating.
- Dry and maintain: Immediately dry all moisture with a dry cloth and let it air dry naturally. Place the handbag in a dry and ventilated place to prevent rusting and fading due to humidity.
- Daily tips: Avoid touching the accessories with oily hands, cosmetics or perfume. Regular gentle wiping can keep the hardware surface shiny and extend its lifespan.
Core Principle: Regular Maintenance Is Key
Before discussing how to “repair”, remember that the best approach is to prevent problems before they occur. Regular, careful maintenance can keep hardware items shiny for a long time.
- Regular cleaning: After each use, wipe the hardware surface with a clean, soft dry cloth (such as a spectacle cloth) to remove sweat, fingerprints, and dust. This is the simplest and most effective way to slow down oxidation.
- Avoid contact with chemicals: Keep the hardware away from perfumes, alcohol, hand creams, and all kinds of cleaners. They will accelerate the corrosion of the coating.
- Pay attention to storage environment: When not in use, store the bag in a dry, cool, and ventilated place, and use the original dust-proof bag. Avoid friction and collision between hardware items or with hard objects.
Special Cleaning Methods for Different Materials of Hardware
Bronze Hardware
- Slight oxidation: Use a soft cloth to dip in a small amount of tomato sauce and wipe it. Let it stand for 5 minutes before wiping clean.
- Severe oxidation: Use a special bronze polishing agent and wipe according to the instructions.
Note: Bronze hardware will naturally oxidize to form a patina. If you like the vintage look, you can reduce the cleaning frequency.
Stainless Steel Hardware
- Daily cleaning: Use a microfiber cloth dipped in glass cleaner for wiping.
- Hard stains: Dip a soft cloth in a small amount of white vinegar and wipe it, then dry it immediately.
Note: Avoid using chlorine-based cleaners to prevent corrosion of the stainless steel surface.
Electroplated Hardware (Gold/Silver)
- Daily cleaning: Gently wipe with a dry microfiber cloth.
- Minor oxidation: Wipe with a soft cloth dipped in a small amount of baby oil or olive oil.
Note: Avoid using any abrasive materials to prevent damage to the electroplated layer.
Plastic Hardware
- Daily cleaning: Wipe with a damp towel dipped in mild soapy water.
- Hard stains: Wipe gently with a soft cloth dipped in a small amount of toothpaste, then wipe clean.
Note: Avoid using organic solvents to prevent plastic deformation or discoloration.
Summary of Guidelines for Handling Different Materials of Hardware
When cleaning, the first step is to determine whether the hardware is solid metal or has a surface coating. This is extremely crucial.
| Hardware Type | Material / Characteristics | Recommended Cleaning Method | Special Notes |
| Solid brass / copper | Common on vintage bags; no plating layer | Daily: Wipe with a soft cloth. Use a cotton swab dipped in a little vinegar or lemon juice to remove oxidation spots. Heavy oxidation: Use a polish like Brasso. | After deep cleaning, apply a thin layer of clear nail polish or a dedicated protective coating to seal the metal and prevent further oxidation. |
| Gold-plated hardware | Common on modern luxury bags; thin gold layer on surface | Gentle cleaning: First choice is a jewellery polishing cloth (e.g., for silver) or a specialised hardware care cloth. Also, a cotton swab with a tiny amount of mild toothpaste or neutral cleaner can be used. | Never use strong abrasives or rough tools – they will easily wear through the thin gold layer, causing irreversible damage. |
| Other plated hardware | Palladium, ruthenium, rose gold, etc. | Gentle care: Similar to gold-plated hardware – use a jewellery polishing cloth or specialised metal care cloth. | Also avoid abrasives to prevent scratching or damaging the plating, which would affect its unique colour. |
| Stainless steel / alloy | Whitish colour, hard, corrosion resistant | Basic cleaning: Usually just wiping with a soft cloth is sufficient. Very durable. | No need for strong cleaners unless visibly dirty. |
| Rusty / heavily oxidised hardware | Green or black tarnish spots | Professional handling: Best to leave to a leather care specialist. | Do not scrape or scrub randomly – improper handling can permanently damage the hardware. |
Summary of Daily / Light Cleaning (Do This Weekly)
| What to Use | How |
| Dry microfiber cloth (or old soft t-shirt) | Gently wipe all metal surfaces — clasps, chains, feet, logo plates |
| Cotton swab (Q-tip) | Get into crevices: zipper pulls, chain links, rivets |
| Soft brush (makeup brush or old toothbrush) | Lightly brush around clasps and hinges to remove dust buildup |
By Hardware Finish
| Finish | Best Method | Avoid |
| Shiny Gold (Hermès, Chanel) | Soapy water + dry microfiber buff | Harsh chemicals, acidic cleaners |
| Pale / Light Gold (Celine, The Row) | Dry cloth only (plating is thin) | Toothpaste, anything abrasive |
| Ruthenium / Gunmetal (Balenciaga, Prada) | Soapy water + dry buff | Bleach, ammonia |
| Silver / Palladium (LV, Gucci) | Aluminum foil + baking soda method | Chlorine (pool water!) |
| Rose Gold (Dior) | Soapy water + toothpaste (white only) | Steel wool, scouring pads |
| PVD-coated (top-tier) | Dry soft cloth only | Abrasive anything — PVD is hard but the base metal underneath isn’t |
What to NEVER Do
| ❌ Don’t | Why |
| Don’t use steel wool / scouring pads | Will scratch plating permanently |
| Don’t use bleach, ammonia, or vinegar | Dissolves protective plating → rust/tarnish |
| Don’t use “magic eraser” (melamine sponge) | It’s essentially fine sandpaper — will destroy the finish |
| Don’t soak hardware in water | Water seeps into hinges/clasps → internal rust |
| Don’t use nail polish remover / alcohol | Strips plating instantly |
| Don’t rub with paper towels | They’re wood-pulp based = micro-scratches |
Prevention = Best Cleaning
| Habit | Why It Helps |
| Wipe hardware after each use | Sweat + oils cause tarnish within hours |
| Store bag with hardware facing up | Prevents scratches from other items |
| Use a dust bag | Dust is mildly abrasive over time |
| Keep away from perfume/hand sanitizer | Alcohol-based products eat plating |
| Apply clear nail polish to screws/feet | Creates a sacrificial barrier against scratches |
Moderate Oxidation / Tarnishing
For: Dull finish, light darkening, water stains
Brass / Gold-Plated Hardware
| Method | Operation |
| Metal polishing cloth | Use a dedicated silver/gold polishing cloth; wipe in one direction |
| Toothpaste (non-abrasive) | Apply a tiny amount to a soft cloth, rub gently, then wipe clean immediately |
| Lemon juice + baking soda | Mix 1:1 into a paste, apply for 1 minute, then wipe clean (for solid metal only; avoid plated surfaces) |
Stainless Steel / Silver Hardware
| Method | Operation |
| Silver polishing cloth | Most effective and safe; will not damage plating |
| Alcohol swab (75%) | Quickly wipe oxidized spots; dry immediately |
| Diluted white vinegar | Mix 1:3 with water; use a cotton swab for stubborn oxidation |
Severe Oxidation / Green Rust
For: Verdigris, heavy darkening, peeling plating
| Condition | Treatment |
| Solid brass oxidation | Use brass cleaner (e.g., Brasso). Apply with a cotton swab, let sit for 30 seconds, then wipe clean |
| Peeling plating | Do not polish — this accelerates plating loss. Send to brand after-sales service or a professional leather care shop |
| Rust on screws / crevices | Use an ultra-soft brush (toothbrush/eyebrow brush) dipped in a small amount of WD-40; brush gently, then wipe clean with a dry cloth |
Cleaning Precautions
Avoid using cleaners containing alcohol, ammonia, or acetone as they may corrode the metal surface.
Do not immerse the hardware in water for a long time to prevent accelerated oxidation.
Avoid using steel wool ball or rough abrasive materials as they may scratch the metal surface.
After cleaning, make sure to dry thoroughly to prevent water stains from causing oxidation.
Special Recommendations for Luxury bag Hardware
For top-quality handbags from brands like Hermès and Chanel, it is recommended to handle their hardware with greater care.
- Careful handling of complex craftsmanship: For example, Hermès’ hardware often employs multi-layered complex techniques, and some even feature hand-carved details. Therefore, it is not advisable to perform deep polishing by oneself; a professional institution is a more reliable choice.
- Cleaning of stains in layers: If there is contamination, it should be cleaned in two stages. First, use a cotton cloth dipped in a small amount of mild cleaner to quickly and gently wipe the surface of the hardware, then use a dry cotton cloth for polishing. For stubborn stains, use a cotton swab dipped in a small amount of mild cleaner for precise treatment.
- Protecting the leather: During cleaning, be sure to cover the leather around the hardware with a dry cloth or tape to prevent cleaning agents from causing contamination or damage.
- The value of professional repair: For wear or loss of the coating, only professional institutions can repair it through methods such as re-electroplating. Professional polishing services can not only remove the oxide layer but also maximize the retention of the coating.
How to Restore Bag Hardware?
The goal of repairing the hardware components of the bag is to restore it to its original state as much as possible. The core principle here is that different repair approaches should be adopted based on the varying degrees of damage.
In simple terms, for minor surface issues such as oxidation and scratches, one can try to handle them on their own; but for issues like color fading and peeling of the coating, professional electroplating refurbishment is required.
The key difference behind this lies in the fact that there is a very thin metal coating on the surface of the hardware. Daily polishing can restore the luster, but essentially it is wearing away this “protective layer”. Repeated operations may cause it to completely fall off. Therefore, prevention in daily life is far more important than post-event repair.
DIY Restoration vs. Professional Replating
| Type of Damage | DIY Method | How It Works | Effectiveness / Limitations |
| Dirt / stains | Clean with a soft cloth and a little mild soapy water, then dry | Physically removes surface grime | Suitable for daily cleaning; does not fix oxidation or scratches |
| Light oxidation / fine scratches | Use a jewellery polishing cloth or metal polish, gently rubbing in circular motions | Uses fine abrasives to remove a very thin oxidized layer or light scratches | Effective for light oxidation and fine scratches; restores some shine. Improper use can damage the plating |
| Moderate oxidation / aged look | Use ultra fine sandpaper (e.g., 5000 grit) very gently on blackened spots, then polish | Physical abrasion to remove the oxidized layer | Risky – only recommended for solid vintage hardware. Sanding removes the surface layer entirely; proceed with extreme caution and protect the leather |
| Heavy wear / plating loss | Do not attempt | – | No DIY method can restore lost plating; it will only worsen the problem. The only solution is professional restoration |
The Key Steps of Professional Restoration
- Assessment and disassembly: Professional personnel will first assess the damage and carefully remove the hardware from the bag to prevent any damage to the leather during subsequent processing.
- Cleaning and polishing: The removed hardware will be thoroughly cleaned and undergo rough and fine polishing to eliminate surface flaws, creating the best foundation for re-plating.
- Professional electroplating: Based on the original hardware material (such as brass) and color (such as gold, palladium gold), the technician will immerse the hardware in an electroplating solution using professional equipment, allowing new metal ions (such as gold, palladium) to deposit uniformly on the surface through an electric current.
- Quality inspection and reinstallation: After the plating process is completed, a quality check will be conducted to ensure uniform color and thickness. Finally, the restored hardware will be carefully reinstalled onto the bag.
Assess the Damage
| Condition | Restoration Level | DIY Possible? |
| Dullness, light fingerprints | Polish / buff | ✅ Yes |
| Surface tarnish, darkening | Chemical clean | ✅ Yes (with caution) |
| Verdigris (green rust) on brass | Deep clean | Limited |
| Scratches on metal | Buffing / refinishing | Risky |
| Peeling, flaking, or worn plating | Replating required | ❌ No — professional only |
| Broken mechanisms, bent rings | Structural repair | ❌ No — professional only |
Gather Restoration Tools
| Tool | Purpose |
| Microfiber cloths | Non-abrasive polishing |
| Cotton swabs / soft-bristle brushes | Precision cleaning in crevices |
| Metal polishing cloth (e.g., Sunshine Cloth, Blitz Cloth) | Removes tarnish from solid brass/silver |
| Brass cleaner (e.g., Brasso) | Deep oxidation on unplated brass |
| Silver dip / silver polish (e.g., Hagerty) | Sterling or silver-plated hardware |
| Clear nail polish / Renaissance Wax | Protective sealant after restoration |
| Masking tape / plastic wrap | Protect adjacent leather |
| Magnifying glass | Inspect plating integrity |
Restoration by Metal Type
Solid Brass Hardware (Unplated or Raw Metal)
| Step | Action |
| 1. Clean | Wipe with a damp cloth to remove surface dirt |
| 2. Apply brass cleaner | Use a cotton swab to apply Brasso to tarnished areas only |
| 3. Wait | Let sit for 30–60 seconds |
| 4. Buff | Rub vigorously with a microfiber cloth until shine returns |
| 5. Neutralize | Wipe with a clean, damp cloth to remove residue |
| 6. Dry | Dry immediately and thoroughly |
| 7. Seal (optional) | Apply a thin coat of Renaissance Wax or clear lacquer to slow future oxidation |
Note: If brass has turned green (verdigris), the above method works. For heavy pitting, professional refinishing is needed.
Gold-Plated Hardware
| Condition | Action |
| Dull but intact plating | Use a gold-polishing cloth (e.g., Connoisseurs Gold Polishing Cloth). Gentle, one-directional wipes only. |
| Tarnished spots | Dampen a cotton swab with warm water and a drop of mild dish soap. Gently rub the spot, then dry instantly. |
| Flaking or peeling plating | Stop. No home method can fix this. The only restoration is professional electroplating. |
Critical: Never use abrasive compounds, baking soda, or vinegar on gold-plated hardware. You will strip the remaining plating.
Silver / Palladium / Rhodium-Plated Hardware
| Step | Action |
| 1. Inspect | Check for yellowing underneath — this means the plating is gone |
| 2. Polish | Use a silver-specific polishing cloth (not liquid dip, which can seep into leather) |
| 3. Targeted cleaning | For crevices, use a silver polish paste on a cotton swab, not a brush |
| 4. Remove residue | Wipe with a clean, dry microfiber cloth |
| 5. Protect | Apply a thin layer of clear nail polish on high-friction areas (e.g., clasp interiors) to reduce future wear |
Stainless Steel Hardware
| Action | Method |
| Minor scratches | Buff with a microfiber cloth; scratches on steel are usually shallow |
| Dullness | Use a stainless steel cleaner (e.g., Sheila Shine or Weiman) on a cloth, not directly on the metal |
| Rust spots | Extremely rare on quality hardware; if present, use a fiberglass scratch brush (gentle) or send for repair |
Coated / Lacquered Hardware (Gunmetal, Black, Enamel)
| Condition | Action |
| Surface smudges | Damp cloth only; do not polish |
| Chipped coating | No home fix. Options: touch-up with model paint (risky), or professional recoating |
| Fading color | Usually means the electrophoretic lacquer has degraded. Requires professional recoating. |
Protecting Leather During Restoration
| Step | Protection Method |
| 1. Mask | Apply masking tape or painter’s tape around the hardware base, covering all leather within 5mm |
| 2. Position | Work with the bag positioned so liquids run away from leather, not toward it |
| 3. Minimal liquid | Never soak hardware; use damp swabs, not dripping applicators |
| 4. Immediate dry | Have dry cloths ready; wipe the second cleaning stops |
| 5. Post-restoration leather care | If any chemical touched the leather, condition that area 24 hours later |
Post-Restoration Protection
| Method | Application |
| Renaissance Wax | Thin coat on solid brass/copper; buff to invisible layer. Lasts months. |
| Clear nail polish | Brush a thin layer on interior clasp surfaces, D-rings, and other high-friction points. Reapply every 6–12 months. |
| 3M Anti-Tarnish Strips | Place inside the dust bag to absorb sulfur compounds in the air. |
| Silica gel packets | Store in the bag to control humidity. |
When to Seek a Professional
| Problem | Professional Solution | Cost Range (Estimate) |
| Peeling plating | Electroplating (re-gold, re-silver, re-palladium) | $50–$300+ depending on piece count |
| Broken clasp / hinge | Metalworking or replacement part fabrication | $30–$150 |
| Deep scratches on polished metal | Refinishing and re-lacquering | $40–$100 |
| Missing hardware | Custom casting to match original | $100–$500+ |
| Enamel or crystal damage | Stone replacement, enamel repainting | Varies widely |
Daily Prevention Is the Key
Remember, the best “repair” is actually preventing problems before they occur. Remember these simple principles to keep your bag hardware in good condition for a long time:
- Wipe it off: After use, wipe the hardware with a soft dry cloth to remove grease and sweat.
- Isolate from air: When not in use for a long time, wrap the hardware with cling film or soft paper and store it in a dust bag.
- Store separately: Avoid direct contact between multiple bags with hardware, or place the hardware together with hard objects (such as keys) to prevent scratching.
- Keep away from chemicals: Keep the hardware away from perfumes, cosmetics and various cleaning agents.
How to Remove Rust from Bag Hardware?
If the hardware of a bag gets rusty, how can you remove the rust? Removing rust from the hardware of a bag requires great care, as most of the hardware of luxury bags is coated (such as gold-plated or palladium-plated), rather than solid brass. Overgrinding would completely destroy the coating, making it impossible to repair the hardware.
First Principle: Identify the Hardware Type
| Hardware Type | Can Rust Be Removed? | Recommended Method |
| Plated hardware (gold/palladium/rose gold, etc.) | Only extremely light surface spotting | Jewellery polishing cloth / mild polishing cloth; do not use sandpaper or strong acids |
| Solid brass / copper (common on vintage bags) | Moderate rust can be treated | Lemon juice + baking soda paste / Brasso polish |
| Plating already peeling / heavy rust | Cannot be DIY repaired | Must be sent for professional electroplating restoration |
Never use steel wool, scrape with a knife, or soak in acidic liquids like vinegar or cola. These methods will directly destroy the plating.
Safety Rust Removal Steps (from the Gentlest to the Most Aggressive)
Step 1: Dry Cloth Wiping + Eraser
Tools: Microfiber cloth, white drawing eraser
Procedure: First, use a dry cloth to vigorously wipe the rust spots. If ineffective, use the eraser to gently rub the rust points.
Principle: Mechanical removal of surface rust without damaging the coating.
Applicable to: Very minor, newly appearing rust spots.
Step 2: Silver Cloth / Metal Polishing Cloth
Tools: Silver cloth (such as Sunshine cloth; note that it is not regular cloth)
Procedure: Gently wipe the rust spots with the silver cloth. Do not rub back and forth vigorously. Use a single direction or small circles.
Note: The silver cloth contains fine abrasive and chemical agents, which may slightly damage the coating. Do not wash with water. Replace when it turns black.
Applicable to: Minor rust or oxidation on coated hardware.
Step 3: Gentle Chemical Method (for Solid Brass or Severely Rusted Items only)
Formula: Mix lemon juice with baking soda to form a paste, or mix white vinegar with flour to make a paste.
Procedure: Dip a cotton swab in the paste and apply it only to the rust spots. Let it stay for 2-3 minutes, then wipe it clean with a damp cloth and immediately dry it thoroughly with a dry cloth.
Risk: The acid may corrode the coating or penetrate into the leather gaps. Before operation, it is necessary to tightly protect the surrounding leather with tape or plastic film.
Applicable: Solid brass hardware (commonly used in vintage bags), and the rust is quite obvious.
Step 4: Metal Polishing Paste (such as Brasso, Autosol)
Tools: Cotton swabs or soft cloth, a small amount of polishing paste
Procedure: Dip a cotton swab in a very small amount of the polishing paste and gently rub in circular motions only on the rust spots. Stop immediately once the rust is gone. Wipe away the remaining paste with a damp cloth and then polish with a dry cloth.
Warning: The polishing paste is a abrasive and will thin the coating. Each piece of hardware should be used no more than 1-2 times. Never use it on gold-plated, palladium-plated or other luxury hardware.
Applicable: Solid copper/brass, or old hardware without coating protection.
Protection after Rust Removal
- Complete cleaning: Wipe away all chemical residues with a slightly damp soft cloth and immediately dry with a dry cloth.
- Air isolation: Apply a thin layer of transparent nail polish or a specialized hardware protection agent (such as Renaissance Wax) to delay rusting again.
- Daily prevention: Wrap the hardware in cling film or soft paper and place it in a dust bag when storing.
Summary of Protect After Removing Rust
| Method | How | Lasts |
| Clear nail polish | Thin coat on all cleaned hardware | 1–3 months |
| Autosol / metal polish | Thin protective layer | 2–4 weeks |
| Vaseline / petroleum jelly | Tiny dot on chain links | 1–2 weeks |
| Anti-tarnish strips | Place in dust bag | 3–6 months |
| Microcrystalline wax (jewelry wax) | Rub thin layer | 2–4 weeks |
NEVER Do This
| ❌ Don’t | Why |
| Steel wool / scouring pad | Will scratch through remaining plating permanently |
| Soak hardware overnight | Water seeps into hinges → internal rust |
| Bleach / ammonia | Dissolves plating instantly |
| Magic eraser | It’s fine sandpaper for metal |
| WD-40 | Leaves oily residue that attracts more dirt |
| Sandpaper (rough grit) | Will destroy the finish |
| Skip the dry step | Any moisture left = rust comes back in hours |
Prevention = Best Cure
| Habit | Why |
| Wipe hardware after every use | Sweat causes rust within hours |
| Store with hardware facing up | Prevents scratches |
| Apply clear nail polish when new | Sacrificial barrier |
| Keep away from perfume/hand sanitizer | Alcohol eats plating |
| Use silica gel packets in storage | Keeps humidity < 60% |
| Weekly dry microfiber wipe | Catches oxidation before it spreads |
Preventing Future Rust
| Measure | How |
| Control humidity | Store with silica gel packets; avoid bathrooms/closets |
| Avoid contact with water | Dry immediately if wet; never air-dry slowly |
| Apply protective coating | Clear nail polish on high-wear points; reapply every 6 months |
| Regular wiping | Dry cloth after each use removes sweat and moisture |
| Anti-tarnish strips | Place in dust bag to absorb corrosive gases |
Special Cases
Rust on Screws or Internal Mechanisms
| Tool | Method |
| Precision screwdriver set | Remove screw if possible |
| WD-40 + soft brush | Apply to mechanism, work it back and forth |
| Compressed air | Blow out debris from crevices |
| Graphite powder | Lubricate after cleaning to prevent re-rusting |
Rust on Chain Straps
| Approach | Notes |
| Link-by-link cleaning | Wrap leather portions in plastic; clean each metal link with vinegar swab |
| Ultrasonic cleaner | For removable chains only; professional jewelers offer this service |
| Replacement chain | Sometimes more cost-effective than restoration |
When Should One Give Up DIY and Seek Professional Help?
The rust has caused the coating to bubble and peel off, exposing the underlying metal.
The structure of the hardware is complex (such as those with locks or springs), and they cannot be disassembled individually.
The bags are of high value (such as Hermès, Chanel), and any risk is not worth taking.
Professional restoration experts will dismantle the hardware first, then perform rust removal, polishing, and re-electroplating. The cost is usually several to hundreds of dollars per piece, but it can completely restore the original appearance.
Summary of When to Stop and Seek Help
| Red Flag | Why |
| Plating flakes off during cleaning | Exposed base metal will keep rusting; needs replating |
| Leather gets wet/stained | Risk of permanent damage; professional leather-metal separation needed |
| Hardware is riveted, not screwed | Cannot remove safely; DIY risks tearing leather |
| Brand authentication concerns | Altering hardware may affect resale value |
Conclusion
The daily cleaning, maintenance and rust removal of bag hardware should follow the principle of “prevention first, graded treatment”.
The cleaning and maintenance of bag hardware can be done by lightly wiping to prevent oxidation. Avoid using acids, abrasives or soaking in water. For mild oxidation, use toothpaste or silver cloth; for severe rust, professional repair is required. Regularly drying and applying transparent nail polish can effectively prevent rust.
Gentle cleaning, timely drying and isolation from air are the core for prolonging the lifespan of hardware.
If you are running your own bag business and want to customize a batch of high-quality bags and hardware accessories, please feel free to contact us.